Set up the Nylas package in Salesforce
🔍 The Nylas package is compatible with Nylas v3 only. If you're currently using Nylas v2.7 or earlier, see the Upgrade guides for information on migrating to v3.
Nylas offers a Salesforce package that you can use to sync email messages and events into your Salesforce instance, so they're available to your users. This page explains how to set up the Nylas package.
How the Nylas Salesforce package works
After you install and set up the Nylas package in Salesforce, it syncs email messages and events into your Salesforce instance using automated object matching logic.
Nylas syncs email messages and events in any of the following scenarios:
- When any email address in the
to,from, orparticipantsfields matches the email address for a known lead or contact in your Salesforce instance. If the lead or contact is associated with an Opportunity, Salesforce automatically links the email message or event to that Opportunity as well. - When the domain of an email address in the
to,from, orparticipantsfields matches the domain of a known account in your Salesforce instance. For example, a message from an email address ending in@nylas.comwould be synced with the Nylas account.
The Nylas package also includes a lightning web component, the nylasV3AccountInbox, which you can drag and drop onto page layouts for accounts, leads, and contacts. The component provides a responsive and intuitive way for your end users to browse the email messages and events that Nylas synced for a specific record.
Set up the Nylas Salesforce package
Before you set up the Nylas package in your Salesforce instance, you first need to set up your Nylas application and create at least one connector.
🔍 You must have a Salesforce Professional or Enterprise edition to use the Nylas Salesforce package. The package uses Salesforce sites that are only available on these editions.
Install the Nylas package
✨ The latest version of the Nylas Salesforce package is v2.0.3.
First, install the Nylas package and grant it access to the Nylas API URL:
- In Salesforce, run the installation package.
- Select Install for all users, and click Install.

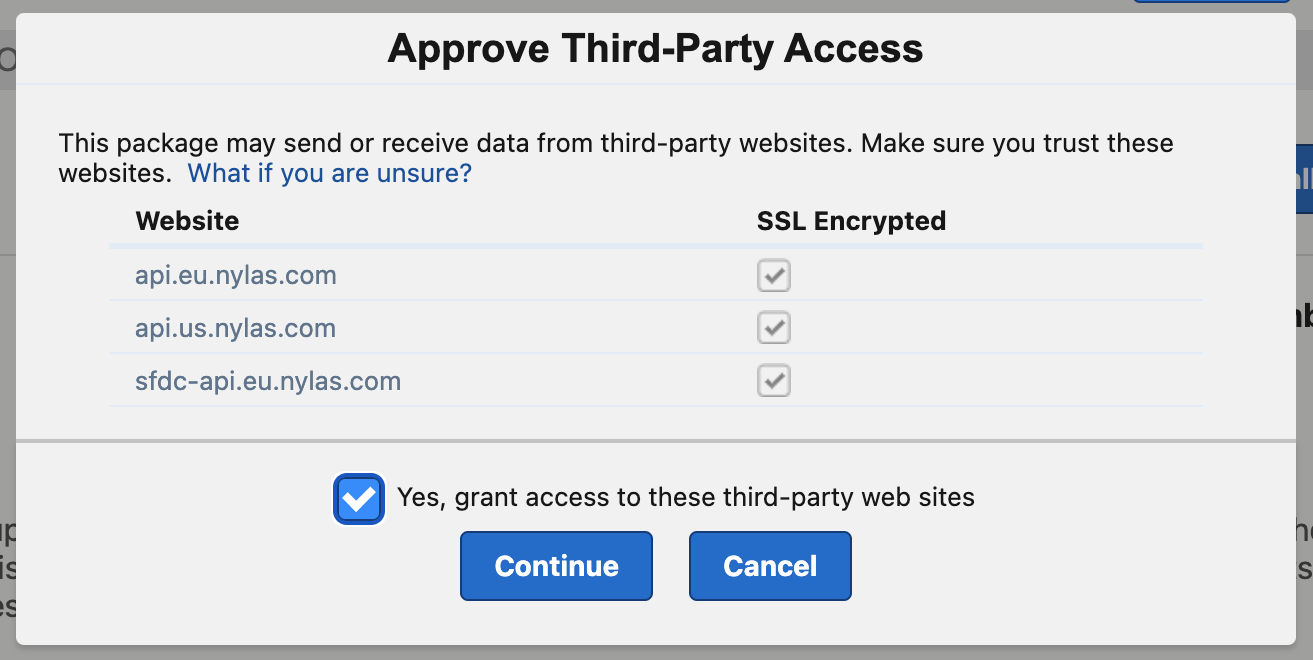
- Check Yes, grant access to these third-party web sites to allow Salesforce to access the Nylas API URL, then click Continue.

Set up a Nylas webhook listener
Next, you'll set up a Nylas webhook listener.
- Set up a Nylas webhook listener site in Salesforce.
- Enable the Apex class for the webhook listener.
- Assign a permission set to the webhook listener users.
Set up a Nylas webhook listener site
First, you need to set up a site to listen for webhooks from Nylas:
- In Salesforce Lightning Experience, click Setup > Sites in the top menu bar. If you haven't already registered your Salesforce site domain, follow the instructions on the page to register it.
- Click New.
- Enter a name for the site in the Site label field (for example, "NylasWebhookListener").
- Select Active and set Active site home page. Nylas recommends you use the default,
InMaintenance. - Save your changes.
Enable the Apex class
Next, enable the Apex class for the webhook listener site. This allows the site to process incoming messages.
- On the Sites page, select the webhook listener site that you created.
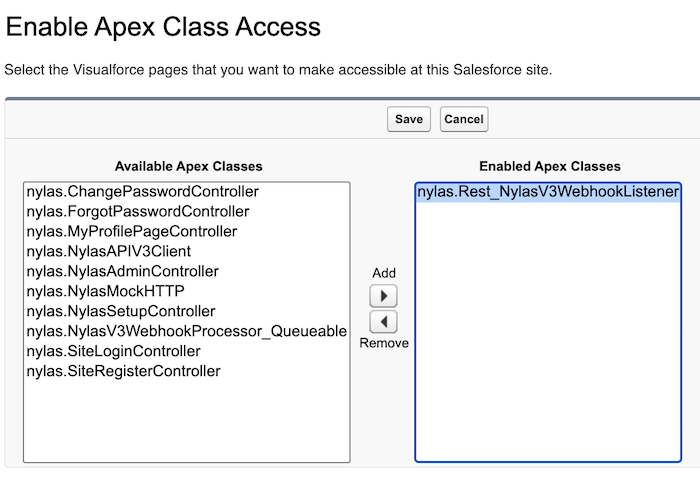
- Click Public access settings > Enabled Apex class access.

- Click Edit.
- Select
nylas.Rest_NylasV3WebhookListenerin the Available Apex classes list, and click Add. This provides the REST resource that handles incoming messages from the Nylas API.

- Save your changes.
Assign permissions to webhook listener users
You also need to assign permissions to the Nylas webhook listener guest users:
- On the Setup page, enter "Guest user" in the search bar and select the first result.
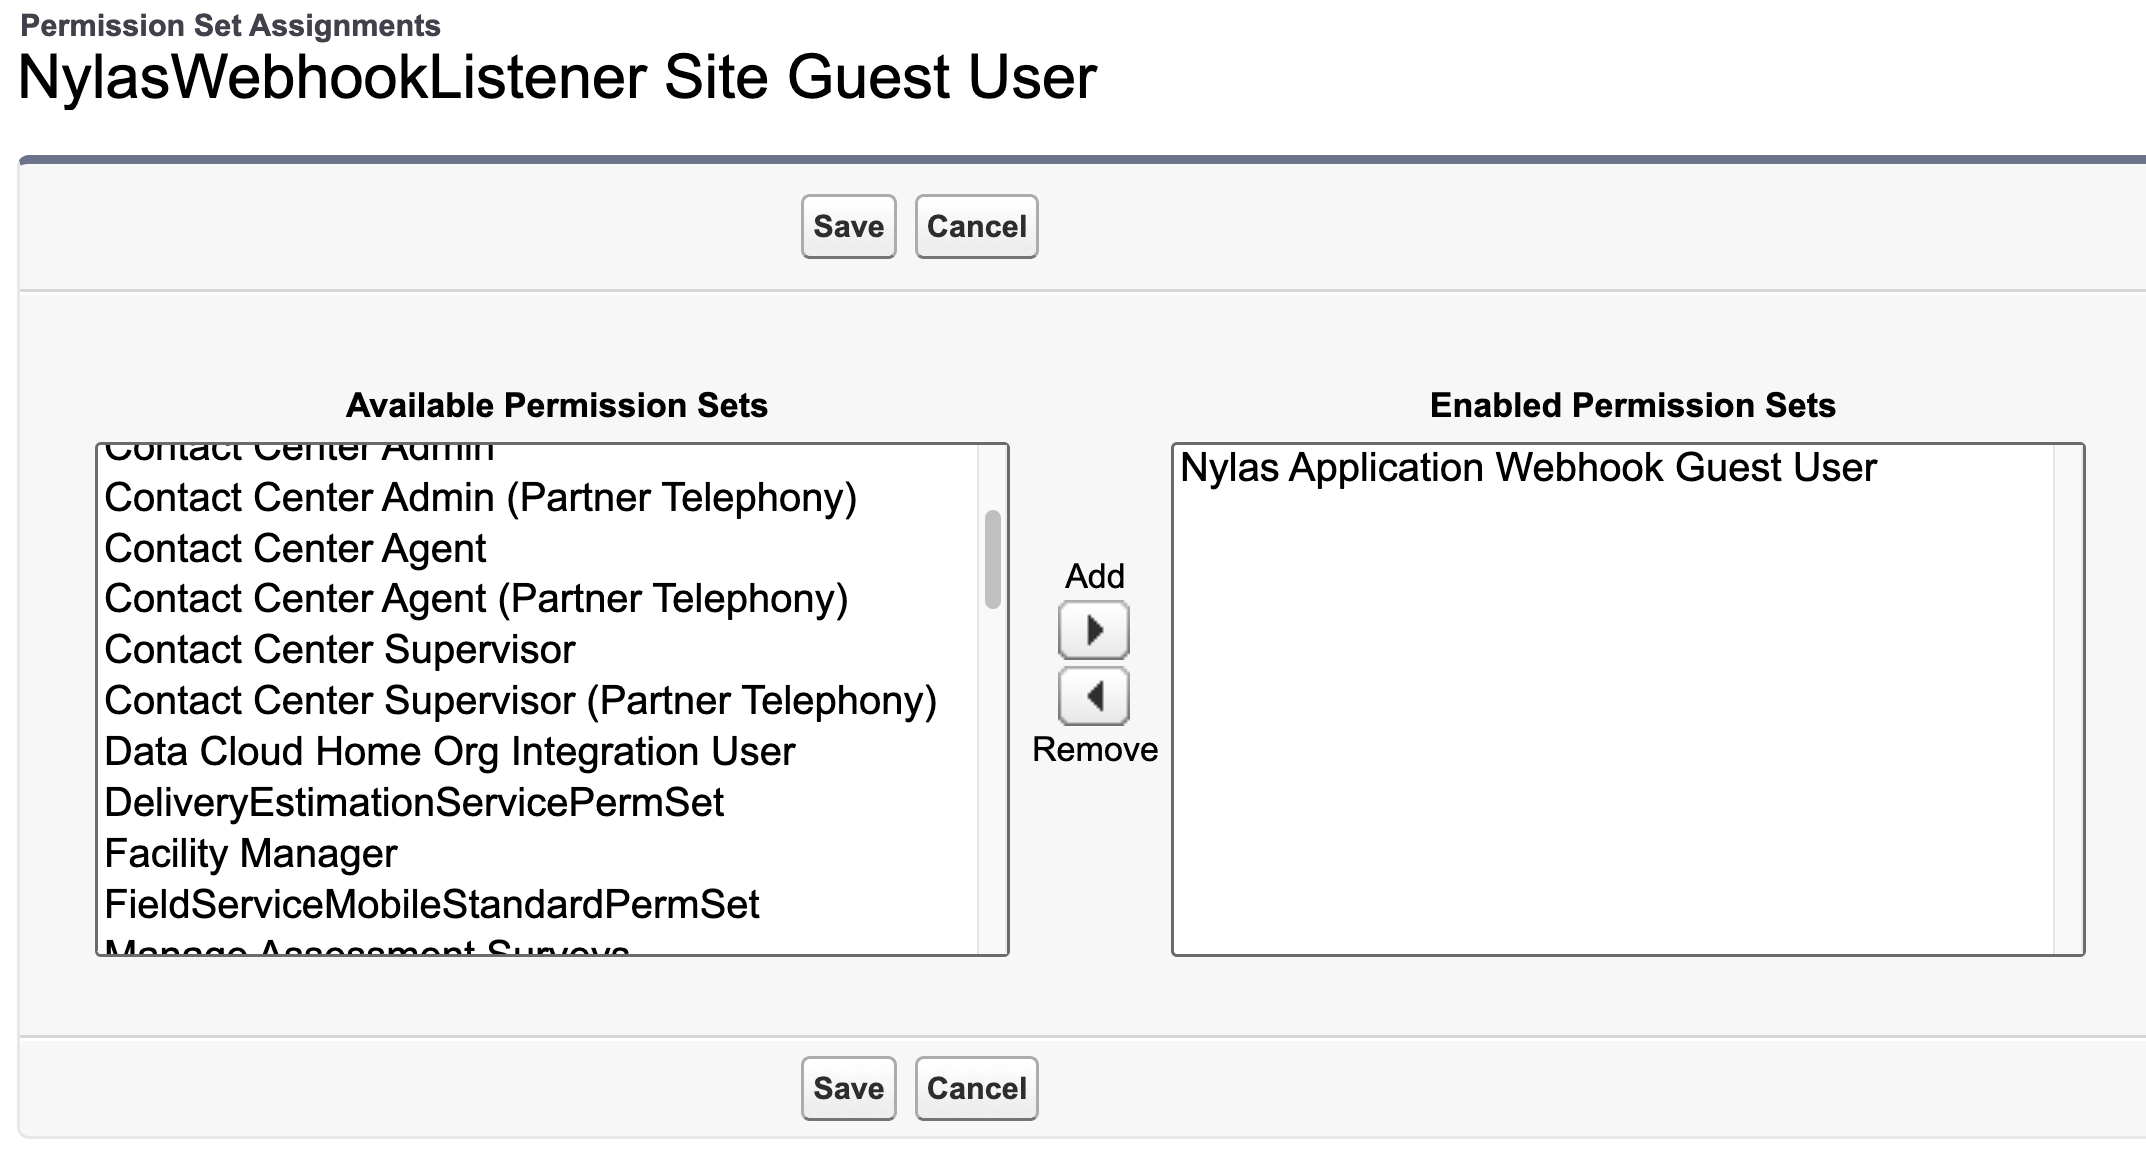
- Under "Users", choose the guest user for the webhook listener site that you created (for example, "NylasWebhookListener Site Guest User").
- Click Permission set assignments > Edit assignments.
- Select Nylas application webhook guest user from the Available permission sets list, then click Add.

- Save your changes.
Enable Nylas billing
Now that your webhook listener is set up, you need to enable Nylas billing for your Salesforce instance:
- In Salesforce Lightning Experience, click the App launcher symbol at the top-left of the page.
- Enter "Nylas" in the search bar and select the application.
- Click Nylas admin > Go to Nylas billing.
- Follow the instructions in the billing portal to activate your Nylas account.
- When your payment is processed, Nylas sends an activation email message to the email address you specified in the billing portal. Copy the activation code from the email and paste it in the Activation code field in the billing portal.
- Click Provision application.
Verify provisioned application
Nylas recommends you verify your application was provisioned successfully after you enable billing.
- In Salesforce Lightning Experience, click Setup > Custom metadata types in the top menu bar.
- Navigate to Nylas v3 setting > Manage Nylas v3 settings > nylas__System_Config.
- If your application was provisioned successfully, the Callback URI, Client ID, Nylas API secret, Webhook secret, and Region fields will be populated with your application information.
Assign permissions to Nylas admin users
Now that your Nylas application is provisioned to Salesforce, you need to assign permissions to your Nylas admins:
- In Salesforce Lightning Experience, click Setup in the top menu bar.
- Enter an admin's username in the search bar and select their account.
- On the User page, click Permission set assignments > Edit assignments.
- Select Nylas application admin from the Available permission sets list, then click Add.
- Save your changes.
Repeat these steps for each of your admin users.
Authenticate users
Finally, assign a permission set to your end users and authenticate their accounts to sync email messages into your Salesforce instance.
Assign permissions to application users
- In Salesforce Lightning Experience, click Setup in the top menu bar.
- Enter a user's username in the search bar and select their account.
- On the User page, click Permission set assignments > Edit assignments.
- Select Nylas application user from the Available permission sets list, then click Add.
- Save your changes.
Assigning this permission set allows your users to access the Nylas application in the Salesforce App Launcher, and view the Nylas setup tab in the application.
Repeat these steps for each of your Nylas users.
Authenticate users with Nylas Hosted Auth
Now that your application users have permissions assigned to their accounts, you can authenticate them:
- In Salesforce Lightning Experience, click the App launcher symbol at the top-left of the page.
- Enter "Nylas" in the search bar and select the application.
- Click Nylas setup > Auth your email with Nylas.
- Follow the instructions on the page to complete the Hosted authentication flow.
When the account is successfully authenticated, Nylas populates the following fields on the User page:
- Authed Nylas v3 integration
- Nylas v3 integration authed date
- Nylas grant ID

When you refresh the Nylas admin tab, Salesforce displays a list of authenticated grants in the Grants table.
Keep in mind
- You can configure email and event sync settings in the Nylas setup tab.
- You can view inbound webhook logs in the Nylas logs tab. If you want to see all logs instead of only the most recent, you need to set up a new view.