Create a Google auth app
This page explains how to create and configure a Google Cloud Platform (GCP) application to use with your Nylas project.
Changes to Google auth apps in v3
Nylas v3 includes the following changes for using Google auth apps:
- The Authorized redirects URIs have been updated:
- For U.S. Hosted authentication use
https://api.us.nylas.com/v3/connect/callback. - For E.U. Hosted authentication use
https://api.eu.nylas.com/v3/connect/callback.
- For U.S. Hosted authentication use
- Added a cURL request to connect your GCP app to Nylas.
- If you're using the Nylas Email API with Google, you must set up a Google Pub/Sub queue.
Before you begin
Before you create your GCP application, you must plan a couple fundamental parts of your project:
Choose authentication method
First, you must decide which authentication method works for you: Hosted OAuth or Custom authentication.
⚠️ If you want to switch authentication methods later, you must create and set up a new Google provider auth app. Your end users will also be required to re-authenticate with the new app.
Hosted OAuth is the fastest way to get started. If you're not interested in customizing your application, or you just want to test with a few end users, Nylas recommends you use Hosted OAuth.
Custom authentication allows you to customize your application's auth process. This means your end users will see your company name instead of "Nylas" on the OAuth screen. If you choose to use Custom auth, you must have an existing v3 Nylas application and a callback URI.
For more information, see Nylas' Google authentication guide.
Choose external or internal application
You must also decide if you want to make your GCP application available to anyone (external) or only end users that are part of your organization (internal).
If your GCP app will need to go through Google's security verification process, create an external application. This option allows end users who aren't from your organization to authenticate with your application. When external users authenticate with your application, they are shown an "Unverified application" warning.
Unverified external GCP applications are limited to 100 authenticated accounts. To raise this limit, you must complete Google's security verification process. For more information, see Google's official Unverified apps documentation.
If you're creating a development or production app for internal use only, Nylas recommends you create an internal application. Only end users who have accounts within your organization (for example, any end user with an @nylas.com email address) will be able to access the application.
Internal GCP applications allow you to skip Google's verification and security review process. If anyone outside your organization needs to authenticate with your app, you'll need to go through Google's security review.
Create Google provider auth app
💡 Nylas recommends you use separate GCP applications for your production and test environments. Even small changes on a verified GCP app could trigger a new verification process, so having a separate app for your test environment gives you flexibility to test without interrupting your production users.
Follow these steps to create a Google provider auth app:
- Go to the Google Cloud Console Create Project page.
- Give your project a name.
- Select your project's Organization and Location.
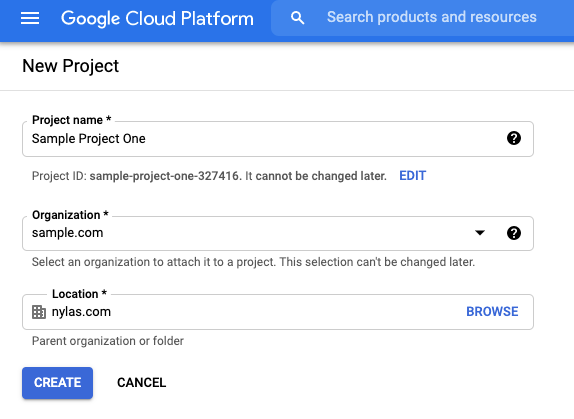
It might take several minutes for Google to create your project. When the process is finished, Google redirects you to the dashboard and displays a Create Project notification.

Enable required APIs
You must enable certain APIs for your Google provider auth app to work with Nylas v3.
- From the Google Cloud Platform dashboard, select APIs and services.
- Click Enable APIs and services.
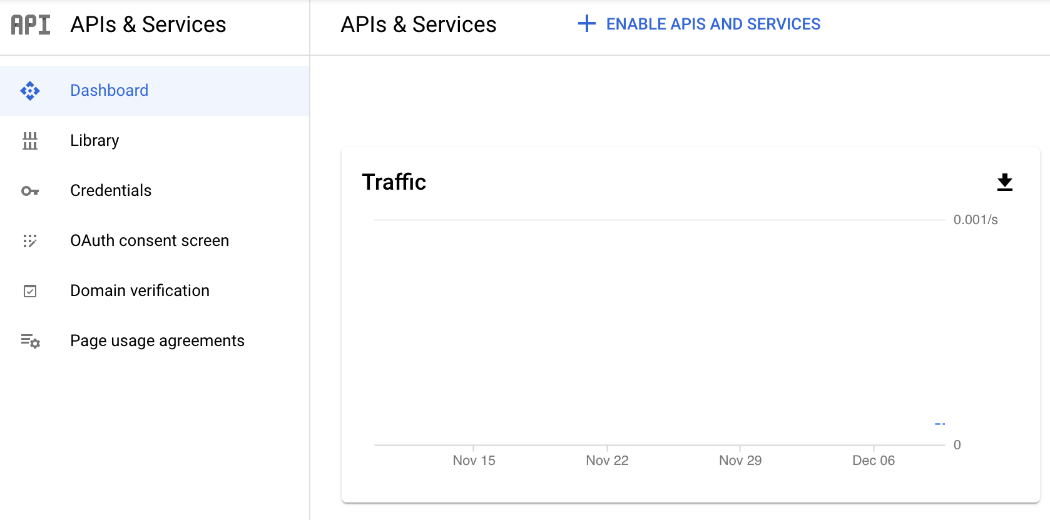
- Search for and enable the following APIs:
- Gmail API: Required to read and send email messages. Also required for the Threads, Drafts, Folders, and Files endpoints.
- Google Calendar API: Required to use the Calendar and Events endpoints.
- People API: Required to use the Contacts endpoints.
- Admin SDK API: Optional. Grants access to room information for calendar events.
Google authentication scopes
Before you can publish your GCP project, you might have to take extra steps to comply with Google's OAuth 2.0 policies and complete their verification process. Be sure to request the most restrictive scopes that you need for your GCP application. If you request any of Google's restricted scopes, Google will require your application to complete a security assessment. This could extend your verification timeline significantly, or cause Google to fail your review.
For more information, see the Google verification and security assessment guide.
⚠️ Nylas does not allow the all-access mail.google.com scope. This scope grants complete access to all Gmail features. Google automatically rejects verification for applications that include it, and makes you break down the access into individual, more granular scopes to complete verification.
The table below lists the available Google auth scopes.
| Google Scope URI | Description |
|---|---|
https://www.googleapis.com/auth/userinfo.email |
Required Google scope. |
https://www.googleapis.com/auth/userinfo.profile |
Required Google scope. |
openid |
Required Google scope. |
https://www.googleapis.com/auth/gmail.modify |
Read, compose, and send email messages from a Gmail account. |
https://www.googleapis.com/auth/gmail.readonly |
View email messages. |
https://www.googleapis.com/auth/gmail.labels |
View and edit Gmail labels. |
https://www.googleapis.com/auth/gmail.compose |
Create drafts and send email messages. |
https://www.googleapis.com/auth/gmail.send |
Send email messages. |
https://www.googleapis.com/auth/calendar |
View, create, edit, and delete calendars and events. |
https://www.googleapis.com/auth/calendar.readonly |
View calendars and events. |
https://www.googleapis.com/auth/calendar.events |
View and edit events on all calendars. |
https://www.googleapis.com/auth/calendar.events.readonly |
View events on all calendars. |
📝 Note: If your GCP app uses the gmail.readonly or gmail.labels scopes, you must set up Pub/Sub. This ensures that you get real-time updates from your app.
For more information about scopes in Nylas v3, see the Scopes documentation.
Automatically include previously granted scopes
Nylas includes Google's include_granted_scopes feature flag when authenticating with Google OAuth 2.0. This feature flag tells Google to include any scopes that the end user already approved on the specific GCP app (assuming the scopes are still valid). This simplifies the auth process for your end users, because they're no longer required to re-select the scopes they already approved when they authenticate again.
Configure Google OAuth page
You can configure the OAuth page for both internal and external GCP applications. This is the page that your end users are directed to when they authenticate with your Nylas application.
Configure internal OAuth page
Follow these steps to configure an OAuth page for internal users:
- From the Google Cloud Platform dashboard, select OAuth consent screen.
- Choose the Internal user type and click Create.
- Fill out the required OAuth consent information and enter
nylas.comas an Authorized domain. - Click Save and continue.
- Select Add or remove scopes, and add the
.../auth/userinfo.email,.../auth/userinfo.profile, andopenidscopes. - Select the scopes needed for your application.
- Review the Summary and ensure the information is correct.
Configure external OAuth page
Follow these steps to configure an OAuth page for external users:
- From the Google Cloud Platform dashboard, select OAuth consent screen.
- Choose the External user type and click Create.
- Fill out the required OAuth consent information and enter
nylas.comas an Authorized domain. - Click Save and continue.
- Select Add or remove scopes, and add the
.../auth/userinfo.email,.../auth/userinfo.profile, andopenidscopes. - Select the scopes needed for your application.
- Skip the Test users step for now.
- Review the Summary and ensure the information is correct.
- Click Back to dashboard.
- Under Publishing status, click Publish app.
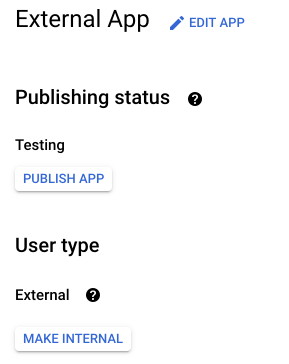
When you publish your Google provider auth app, you must authorize your end users with the Nylas APIs instead of adding them to Google individually as test users. The app is listed as unverified until you complete Google's security review process.
Create Google application credentials
You need your GCP app's client ID and client secret to use the application with the Nylas APIs.
- From the Google Cloud Platform dashboard, select Credentials.
- Click Create credentials and choose OAuth client ID from the list.
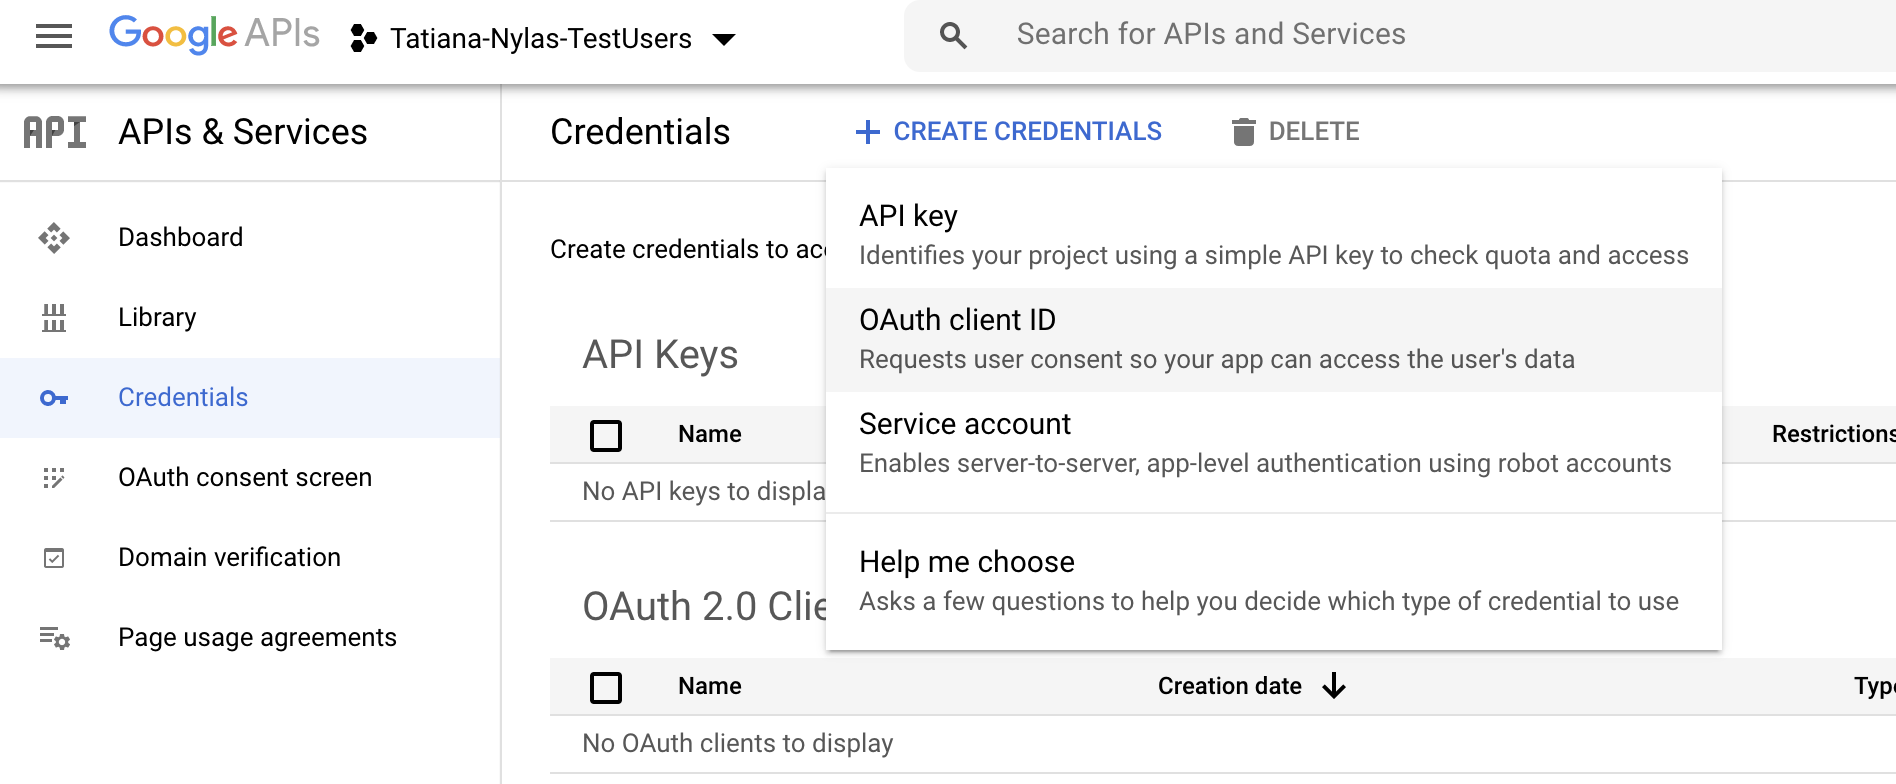
- Set the Application type to Web application.
- Give the application a name.
- Update the Authorized redirect URIs:
- U.S. Hosted auth:
https://api.us.nylas.com/v3/connect/callback - E.U. Hosted auth:
https://api.eu.nylas.com/v3/connect/callback - Custom auth: Your project's callback URI.
- U.S. Hosted auth:
- Click Create. The client ID and secret are displayed in the OAuth client created notification.
⚠️ Be sure to save your client ID and secret somewhere safe, like a secrets manager. For best practices, see Storing secrets securely.
Add Nylas to your Google application
Nylas recommends that you add the Nylas Support team to your GCP app as an application owner. This helps the team diagnose any issues that you might encounter.
- From the Google Cloud Platform dashboard, open the navigation menu and select IAM & admin > IAM.
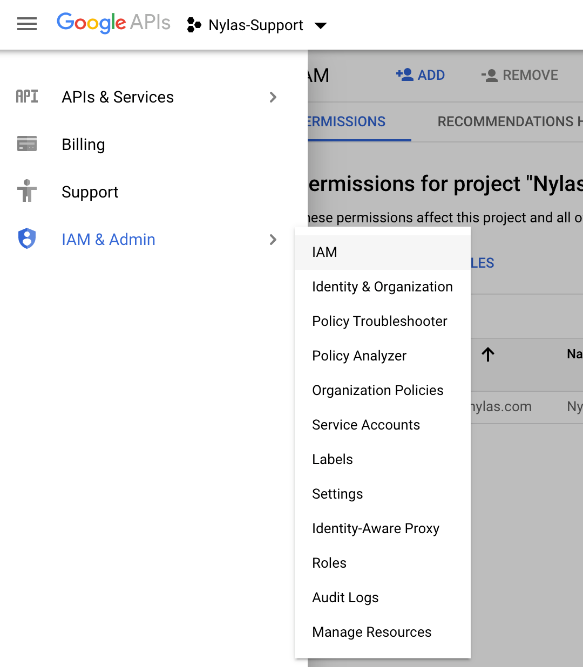
- Click Add.
- Add
support@nylas.comas an owner. - Click Save.
Add the "Sign in with Google" button
Your GCP project must include a "Sign in with Google" button that meets Google's branding guidelines. This applies to the OAuth flow for both personal Gmail (@gmail.com) and Workspace email addresses.
For Hosted authentication in v3, Nylas recommends you do one of the following:
- Configure the OAuth login prompt by setting the
promptparameter withselect_providerordetect,select_provider. For more information, see Configuring the OAuth login prompt.- If you add a
login_hintthat is a personal Gmail or Workspace email address and you don't configure apromptduring the Hosted auth flow, the end user is immediately directed to the Google OAuth screen, without clicking the "Sign in with Google" button. This can result in delays or failure in verification.
- If you add a
- Use the pre-approved "Sign in with Google" button with the “Connect your account” button or other provider login buttons in your application. For more information, see Google's official Sign in with Google branding guidelines.
For Custom auth, use the pre-approved "Sign in with Google" button with the “Connect your account” button or other provider login buttons in your application.
For more information, see the Google verification and security assessment guide.
Add a connector to your Nylas application
⚠️ If you plan to use the Nylas Email API with Google, you must set up Google Pub/Sub before you create a connector. If you don't plan to use the Nylas Email API with your GCP app (for example, if you're creating a calendar-only project), you can skip this step.
Your Nylas application communicates with external provider auth apps using connectors. You can create a Google connector by copying the cURL request below and substituting your client ID, secret, and Pub/Sub topic name.
curl -X POST https://api.us.nylas.com/v3/connectors \
  --header 'Authorization: Bearer <NYLAS_API_KEY>' \
  --header 'Content-Type: application/json' \
  --data '{
    "name": "google example",
    "provider": "google",
    "settings":
    {
      "client_id": "<GCP_CLIENT_ID>",
      "client_secret": "<GCP_CLIENT_SECRET>",
      "topic_name": "<PUBSUB_TOPIC_NAME>"
    },
    "scope": [
      "openid",
      "https://www.googleapis.com/auth/userinfo.email",
      "https://www.googleapis.com/auth/userinfo.profile",
      "https://www.googleapis.com/auth/calendar",
      "https://www.googleapis.com/auth/gmail.compose",
      "https://www.googleapis.com/auth/gmail.modify"
    ]
  }'
What's next?
If you've made it this far, congrats! You've learned how to create and configure a Google auth app. 🎉
Next, Nylas recommends creating a test application in the v3 Nylas Dashboard. You can also check out the following topics for more information about authentication in Nylas: